页面推送解决方案
https://centrifugal.github.io/centrifugo/
https://www.goeasy.io/
可以参考!
https://centrifugal.github.io/centrifugo/
https://www.goeasy.io/
可以参考!
HTML视图<div style="display: none;text-align: center"><button type="button" class="layui-btn" id="picker">选择图片</button></div>
JS代码tableSelect.render({
elem: '#picker',
checkedKey: 'id',
searchKey: 'original_name',
searchPlaceholder: '文件源名称',
height:'300',
width:'800',
table: {
url: '/manage/uploads/show',
cols: [[
{ type: 'radio' },
{ field: 'path', title: '缩略图', width:100, templet:'#row-file' },
{ field: 'original_name', title: '文件名' },
{ field: 'path', title: '文件地址' },
{ field: 'extension', width:100, title: '文件类型' },
]]
},
done: function (elem, data) {
//console.log(data);
let NEWJSON = [];
layui.each(data.data, function (index, item) {
NEWJSON.push(item.path)
});
let template = '<img src="/storage/' + NEWJSON.join(',') + '">';
let categoryId = data.data[0].category_id;
if(categoryId == 3) {
template = '<a href="/storage/' + NEWJSON.join(',') + '">'+ data.data[0].original_name +'</a>';
}
if(categoryId == 4) {
template = '<video src="/storage/' + NEWJSON.join(',') + '" controls="controls"></video>';
}
tinyMCE.editors[0].insertContent(template);
}
});
tableSelect扩展layui.use(['form', 'jquery', 'tinymce', 'tableSelect'], function() {
let form = layui.form;
let $ = layui.jquery;
let tableSelect = layui.tableSelect;
tableSelect.render({
elem: '#picIcon',
checkedKey: 'id',
searchKey: 'original_name',
searchPlaceholder: '文件源名称',
height:'300',
width:'800',
table: {
url: '/manage/uploads/show',
cols: [[
{ type: 'radio' },
{ field: 'path', title: '缩略图', width:100, templet:'#row-file' },
{ field: 'original_name', title: '文件名' },
{ field: 'path', title: '文件地址' },
{ field: 'extension', width:100, title: '文件类型' },
]]
},
done: function (elem, data) {
let NEWJSON = []
layui.each(data.data, function (index, item) {
NEWJSON.push(item.path)
})
//elem.val(NEWJSON.join(","));
$('#icon').val(NEWJSON.join(","))
}
});
});
TinyMCE代码tinymce.init({
selector: '#content',
language:'zh_CN',
height:450,
toolbar: 'filemanager',
setup: function (editor) {
editor.ui.registry.addButton('filemanager', { //这里的filemanager与上面toolabar中定义filemanger对应
title: '文件选择',
icon: 'duplicate',
onAction: function () {
$("#picker").click();
//editor.windowManager.openUrl({
//title: '文件选择器',
//url: '/manage/picker',
//height: 400,
//width: 800
//});
}
})
},
});
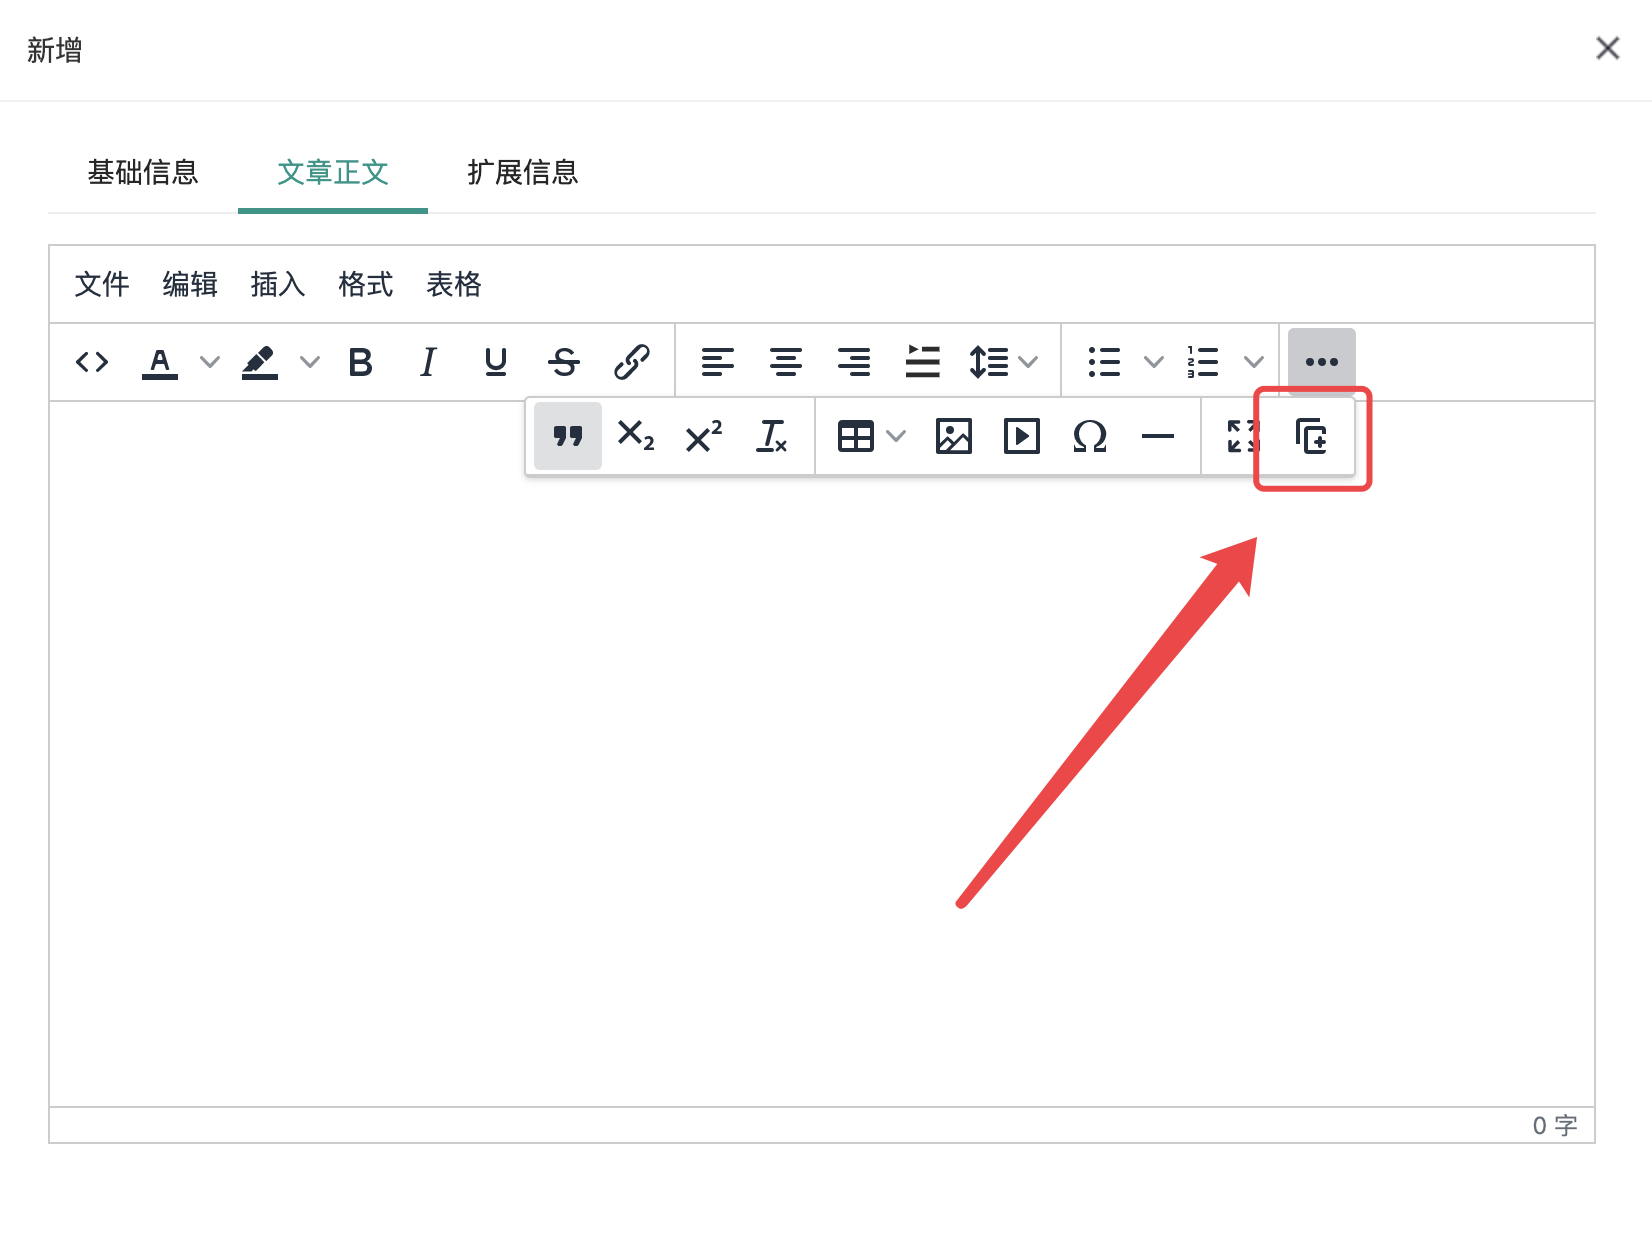
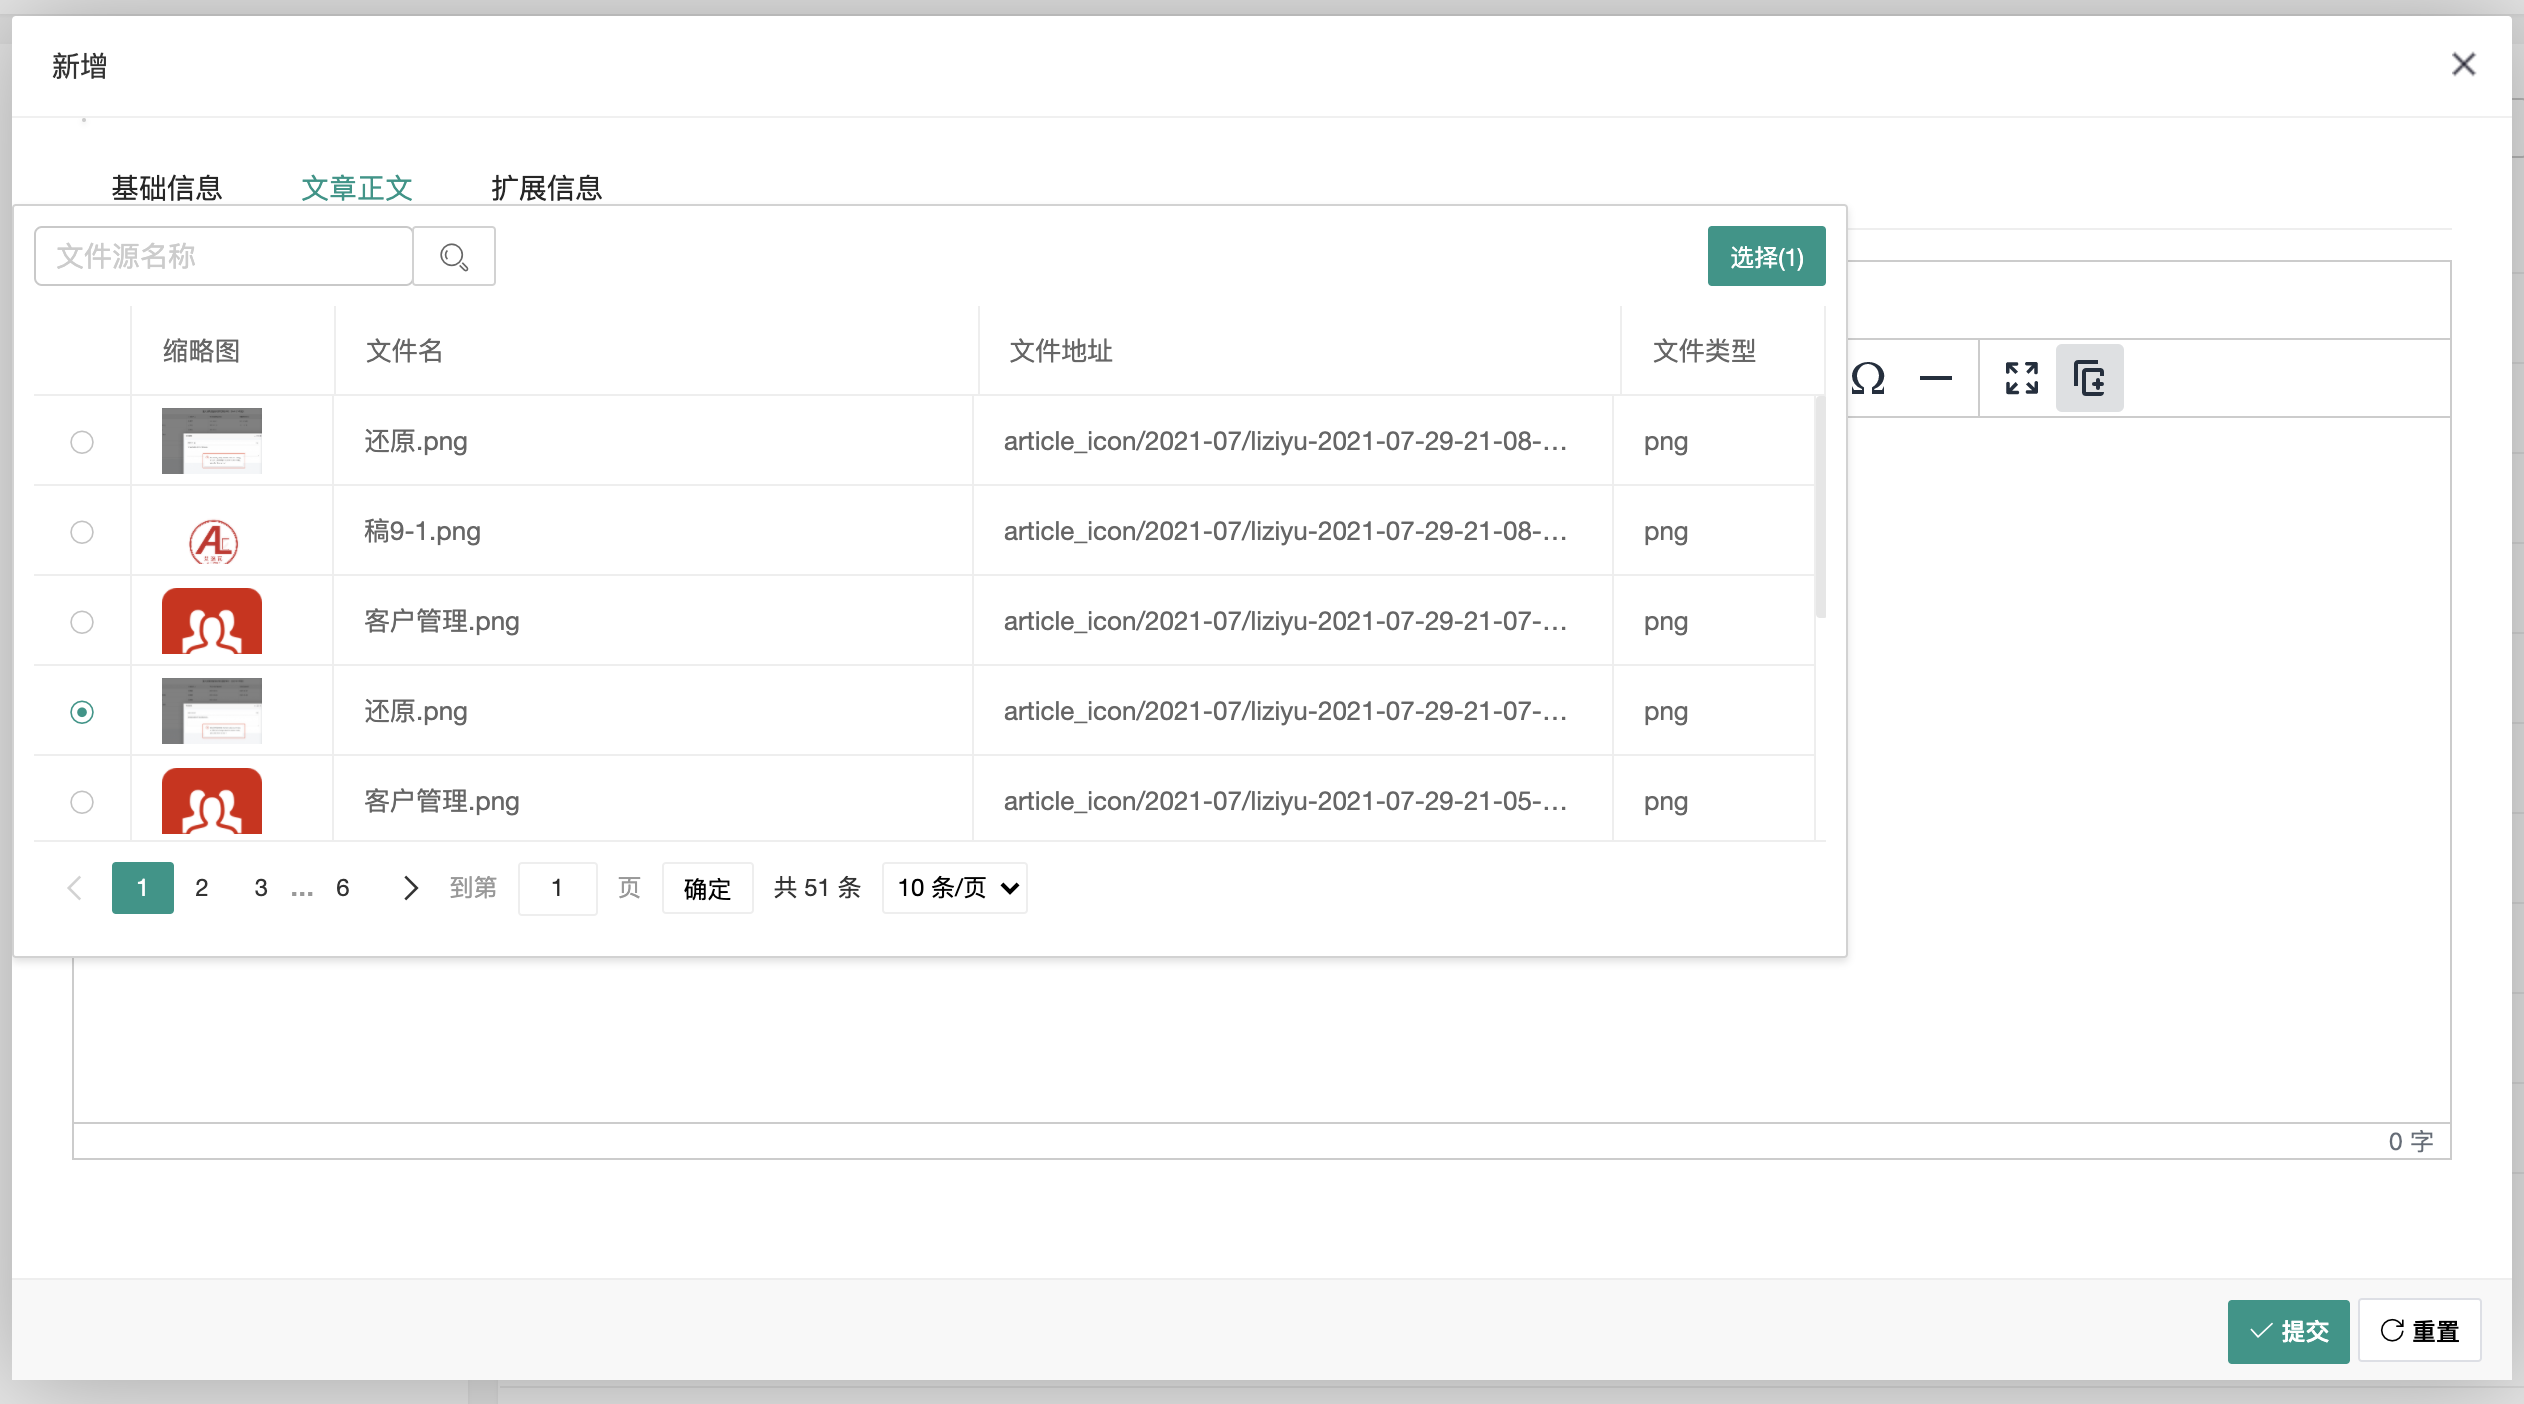
我们需要在tinymce的Plugins目录下新建一个filemanager文件夹,并添加一个名为plugin.min.js,其中editor传参后再图片管理页面通过var editor = top.tinymce.activeEditor.windowManager.getParams().editor; 获取编辑器对象,进行图片插入操作。
tinymce.PluginManager.add("filemanager", function (editor, url) {
    editor.addButton("filemanager", {
        title: "图片管理",
        icon: 'image',
        onclick: function () {
            editor.windowManager.open({
                title: "图片管理",
                url:  "/Administrator/Filemanager/Editor",
                width: window.innerWidth * 0.9,
                height: window.innerHeight * 0.8
            }, {
                    editor: editor // pointer to access editor from cshtml
            })
        }
    })
});
<script>
        //获取tinymce编辑器
        var editor = top.tinymce.activeEditor.windowManager.getParams().editor;

        layui.use(['upload'], function () {
            var upload = layui.upload;
            var dirId = $("#dirId").val() == "" ? 0 : $("#dirId").val();
            upload.render({ //允许上传的文件后缀
                elem: '#upload-img-btn'
                , url: 'UploadImage?dirId='   dirId
                , accept: 'file' //普通文件
                , multiple: true
                , size: 1024 * 2 //限制文件大小,单位 KB
                , exts: 'jpg|jpeg|png|gif' //只允许上传压缩文件
                , done: function (res) {
                    if (res.code == 0) {
                        window.location.reload();
                    }
                }
            });

            //删除图片
            $("#delete-img-btn").click(function () {
                var checkeds = [];
                $("input[name='file-id']:checkbox").each(function () {
                    if (true == $(this).is(':checked')) {
                        checkeds.push({
                            id: $(this).data('id'),
                            type: $(this).data('type')
                        });
                    }
                });
                if (checkeds.length == 0) {
                    layer.alert('请先选择需要删除的文件!');
                }
                else {
                    layer.confirm('删除后将无法恢复,请确认是否要删除所选文件?', {
                        btn: ['确定删除', '我在想想'] //按钮
                    }, function () {
                        $.ajax({
                            type: 'post',
                            url: 'CheckedFilesDelete',
                            data: { checkeds : checkeds },
                            success: function (result) {
                                if (result.code == 0) {
                                    window.location.reload();
                                }
                                else {
                                    showMsg(result.msg);
                                }
                            }
                        })
                    }, function () {
                    });
                }
            })
        })

        //添加图片至编辑器
        $(".file-img").click(function () {
            var url = $(this).data("url"),
                title = $(this).data("title");

            //添加确认
            layer.confirm('是否需要添加此图片?', {
                btn: ['确认添加', '我在想想'] //按钮
            }, function () {
                editor.execCommand('mceInsertContent', false, '<img alt="'   title   '" src="'url   '"/>');
                editor.windowManager.close();
            }, function () {});
        })

    </script>
转自:https://blog.csdn.net/qq_45670012/article/details/101991421
<p>
    <input id="list"  onclick="acheck1()" type="radio" name="list" value="1">选项1
    <input id="list"  onclick="acheck2()" type="radio" name="list" value="2">选项2
</p>
<p class="box1"  style="display:none">点击第一个显示这里</p>
<p class="box2"  style="display:none">点击第二个显示这里</p>
function acheck1(){
    $(".box1").show();
    $(".box2").hide();
}
function acheck2(){
    $(".box2").show();
    $(".box1").hide();
}
$(function(){
    var list = $('#list:checked').val();
    if( list == 1){
        $(".box1").show();
    }
    if( list == 2){
        $(".box2").show();
       }
});
转载:https://blog.csdn.net/kaxixiaozheng/article/details/103125119
参考:https://blog.csdn.net/qq_44275894/article/details/111689856
vue create MyObject —default
项目根目录下新建vue.config.js文件:const path = require('path');
function resolve (dir) {
return path.join(__dirname, dir)
}
module.exports = {
lintOnSave: true,
runtimeCompiler: true, // 使用构建版vue
chainWebpack: (config)=>{
config.resolve.alias
.set('assets',resolve('src/assets'))
.set('components',resolve('src/components'))
//.set('easyui',resolve('src/easyui')) // 我这边是购买 了源代码,直接复制到src目录下使用
}
}
cd MyObject
https://www.jeasyui.net/download/vue.html
参考转载:https://www.jianshu.com/p/fa7156d008a3
开源地址:https://github.com/d2-projects/d2-admin
文档地址:https://d2.pub/zh/doc/d2-admin/
效果预览:https://d2.pub/d2-admin/preview/#/index
开源协议:MIT
开源地址:https://github.com/PanJiaChen/vue-element-admin
文档地址:https://panjiachen.github.io/vue-element-admin-site/zh/
效果预览:https://d2.pub/d2-admin/preview/#/index
开源协议:MIT
开源地址:https://github.com/zhangdaiscott/jeecg-boot
文档地址:https://panjiachen.github.io/vue-element-admin-site/zh/
效果预览:http://boot.jeecg.com/
开源协议:Apache-2.0 License
开源地址:https://github.com/flipped-aurora/gin-vue-admin
文档地址:https://www.gin-vue-admin.com/
效果预览:http://demo.gin-vue-admin.com/#/layout/dashboard
开源协议:Apache-2.0 License
开源地址:https://github.com/chuzhixin/vue-admin-beautiful
文档地址:https://www.gin-vue-admin.com/
效果预览:http://beautiful.panm.cn/
开源协议:MPL-2.0 License
开源地址:https://github.com/jqhph/dcat-admin
文档地址:http://www.dcatadmin.com/
效果预览:http://103.39.211.179:8080/admin
开源协议:MIT License
开源地址:https://gitee.com/y_project/RuoYi
文档地址:https://doc.ruoyi.vip/
效果预览:https://vue.ruoyi.vip/index
开源协议:MIT License
开源地址:https://gitee.com/renrenio/renren-fast-vue
文档地址:https://www.renren.io/guide
效果预览:http://demo.open.renren.io/renren-fast/#/home
开源协议:MIT License
开源地址:https://github.com/ant-design/ant-design-pro
文档地址:https://pro.ant.design/index-cn/
效果预览:https://pro.ant.design/
开源协议:MIT License
开源地址:https://github.com/iview/iview-admin
文档地址:https://lison16.github.io/iview-admin-doc/
效果预览:https://admin.iviewui.com/home
开源协议:MIT License
开源地址:https://github.com/creativetimofficial/material-dashboard#demo
文档地址:https://demos.creative-tim.com/material-dashboard/docs/2.1/getting-started/introduction.html
效果预览:https://demos.creative-tim.com/material-dashboard/examples/dashboard.html
开源协议:MIT License
开源地址:https://github.com/suruibuas/eadmin
文档地址:http://doc.eadmin.com.cn/
效果预览:http://www.eadmin.com.cn/
开源协议:无
源地址:https://mp.weixin.qq.com/s/lGz4Cc5jqGAqqmaOteatvA
作个记号先。
parent.location.reload(); // 父页面刷新
var index = parent.layer.getFrameIndex(window.name); //获取窗口索引
parent.layer.close(index);http://www.fynas.com/http://tool.bitefu.net/jiari/http://timor.tech/api/holiday/