composer版本切换
1、可以将 Composer
降级到 1.x
版,操作如下:
composer self-update --1
2、如果您需要切换回 Composer
2.x
版,只需键入:
composer self-update --2
3、更多信息https://5balloons.info/fix-you-are-using-composer-2-some-plugins-seem-to-be-incompatible-with/
1、可以将 Composer
降级到 1.x
版,操作如下:
composer self-update --1
2、如果您需要切换回 Composer
2.x
版,只需键入:
composer self-update --2
3、更多信息https://5balloons.info/fix-you-are-using-composer-2-some-plugins-seem-to-be-incompatible-with/
收藏:https://github.com/ar414-com/php-source-lib
转载:https://shockerli.net/post/php-awesome/
转载:https://blog.csdn.net/xiaoweite1/article/details/106175892
HTML
视图<div style="display: none;text-align: center"><button type="button" class="layui-btn" id="picker">选择图片</button></div>
JS
代码tableSelect.render({
elem: '#picker',
checkedKey: 'id',
searchKey: 'original_name',
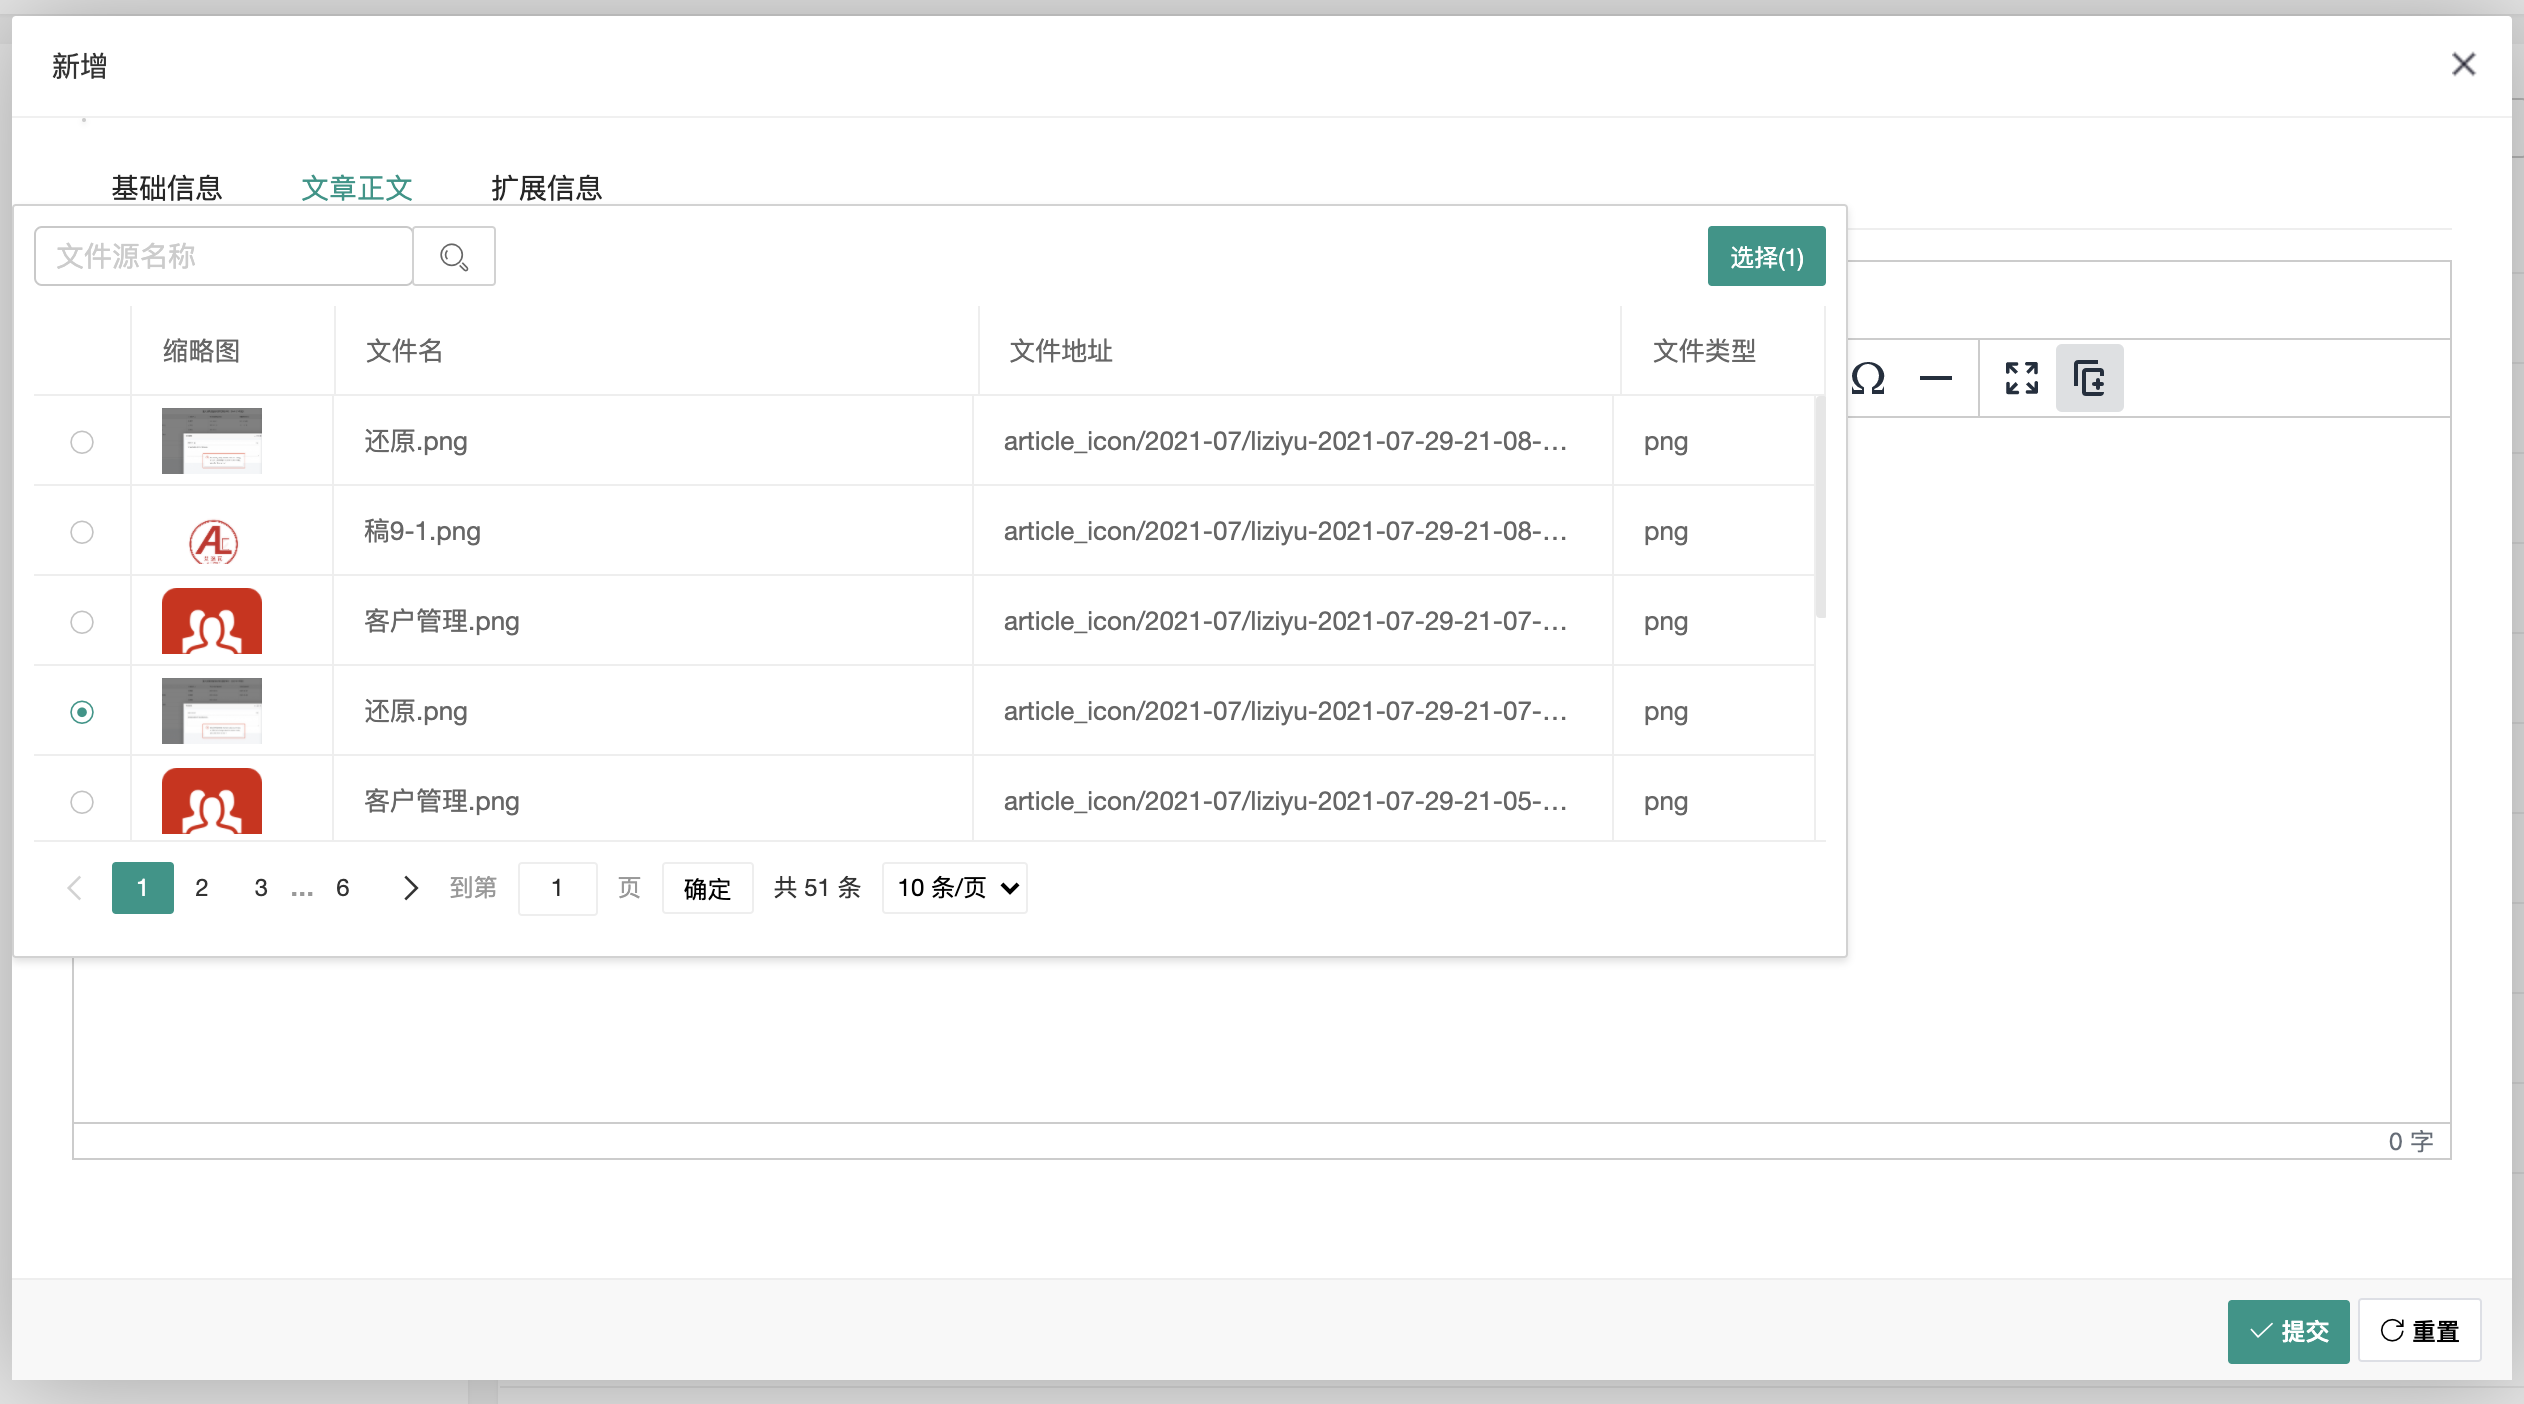
searchPlaceholder: '文件源名称',
height:'300',
width:'800',
table: {
url: '/manage/uploads/show',
cols: [[
{ type: 'radio' },
{ field: 'path', title: '缩略图', width:100, templet:'#row-file' },
{ field: 'original_name', title: '文件名' },
{ field: 'path', title: '文件地址' },
{ field: 'extension', width:100, title: '文件类型' },
]]
},
done: function (elem, data) {
//console.log(data);
let NEWJSON = [];
layui.each(data.data, function (index, item) {
NEWJSON.push(item.path)
});
let template = '<img src="/storage/' + NEWJSON.join(',') + '">';
let categoryId = data.data[0].category_id;
if(categoryId == 3) {
template = '<a href="/storage/' + NEWJSON.join(',') + '">'+ data.data[0].original_name +'</a>';
}
if(categoryId == 4) {
template = '<video src="/storage/' + NEWJSON.join(',') + '" controls="controls"></video>';
}
tinyMCE.editors[0].insertContent(template);
}
});
tableSelect
扩展layui.use(['form', 'jquery', 'tinymce', 'tableSelect'], function() {
let form = layui.form;
let $ = layui.jquery;
let tableSelect = layui.tableSelect;
tableSelect.render({
elem: '#picIcon',
checkedKey: 'id',
searchKey: 'original_name',
searchPlaceholder: '文件源名称',
height:'300',
width:'800',
table: {
url: '/manage/uploads/show',
cols: [[
{ type: 'radio' },
{ field: 'path', title: '缩略图', width:100, templet:'#row-file' },
{ field: 'original_name', title: '文件名' },
{ field: 'path', title: '文件地址' },
{ field: 'extension', width:100, title: '文件类型' },
]]
},
done: function (elem, data) {
let NEWJSON = []
layui.each(data.data, function (index, item) {
NEWJSON.push(item.path)
})
//elem.val(NEWJSON.join(","));
$('#icon').val(NEWJSON.join(","))
}
});
});
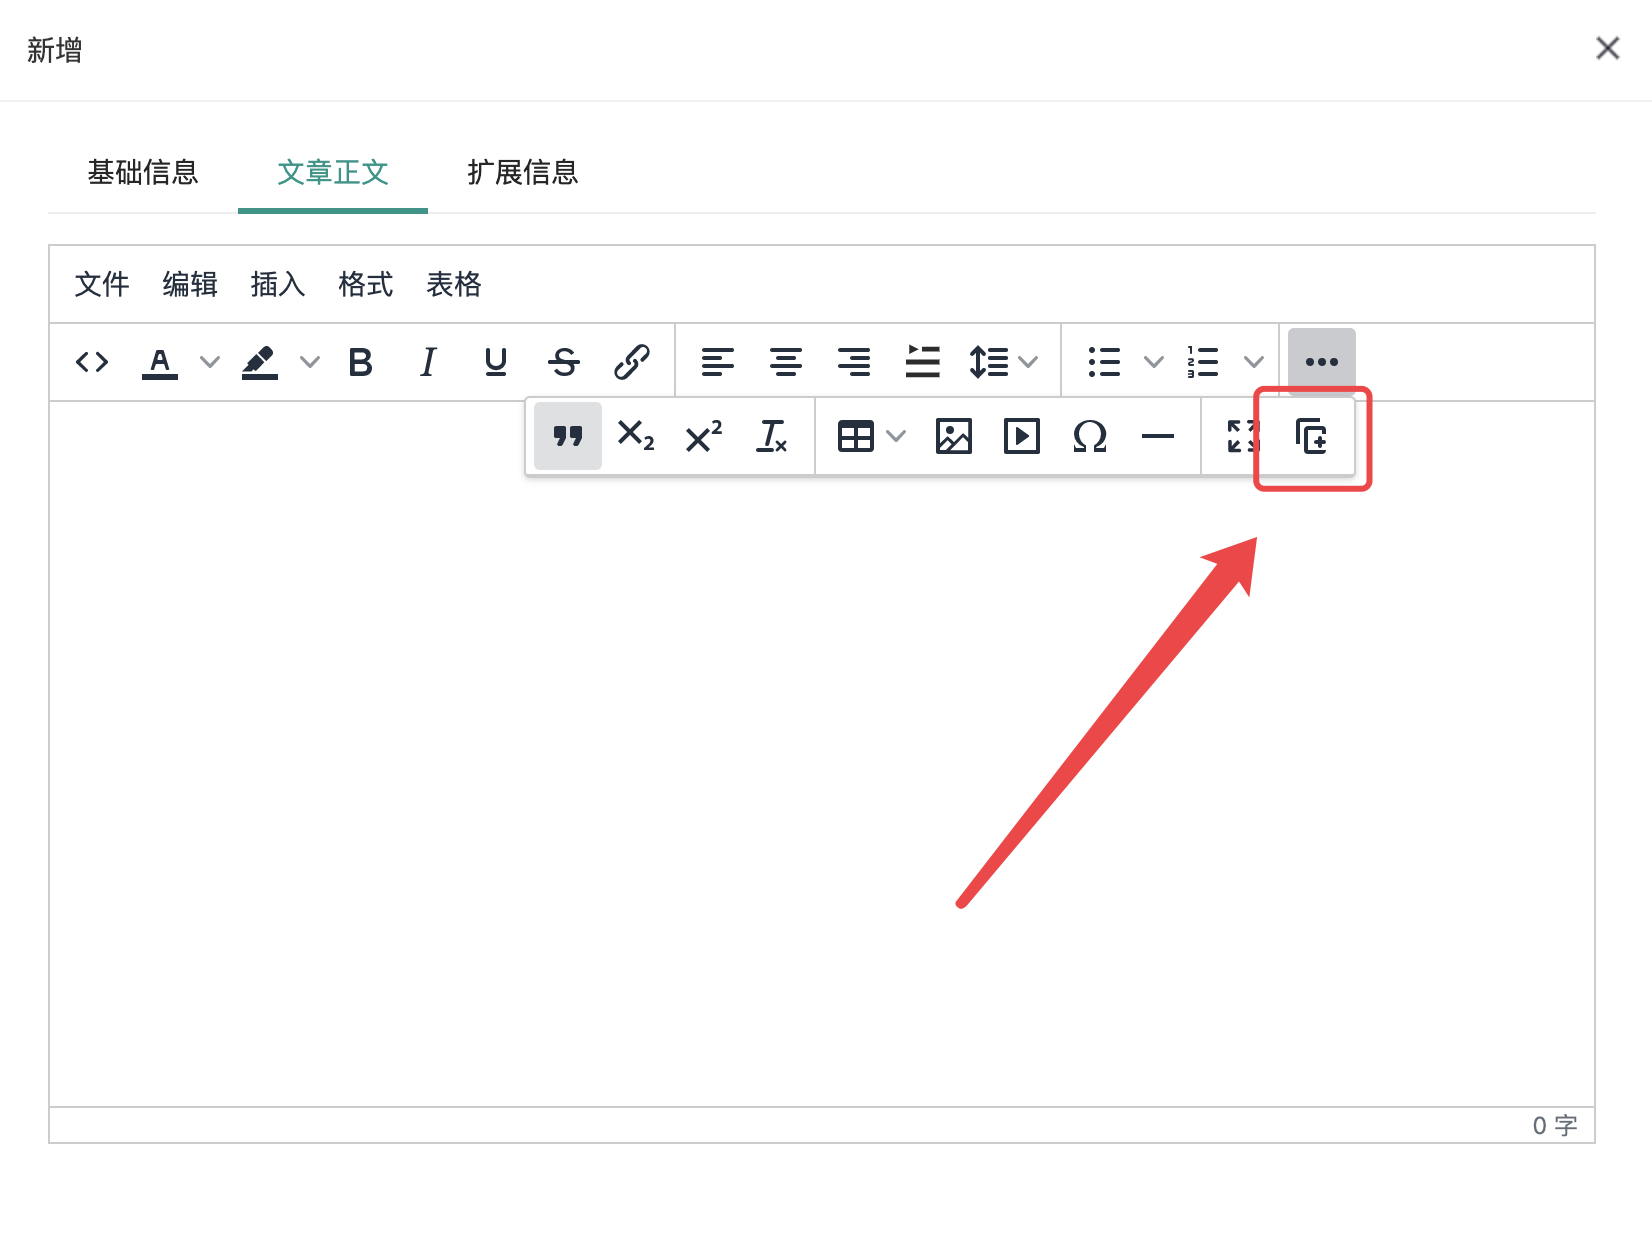
TinyMCE
代码tinymce.init({
selector: '#content',
language:'zh_CN',
height:450,
toolbar: 'filemanager',
setup: function (editor) {
editor.ui.registry.addButton('filemanager', { //这里的filemanager与上面toolabar中定义filemanger对应
title: '文件选择',
icon: 'duplicate',
onAction: function () {
$("#picker").click();
//editor.windowManager.openUrl({
//title: '文件选择器',
//url: '/manage/picker',
//height: 400,
//width: 800
//});
}
})
},
});
我们需要在tinymce
的Plugins
目录下新建一个filemanager
文件夹,并添加一个名为plugin.min.js
,其中editor
传参后再图片管理页面通过var editor = top.tinymce.activeEditor.windowManager.getParams().editor;
获取编辑器对象,进行图片插入操作。
tinymce.PluginManager.add("filemanager", function (editor, url) {
editor.addButton("filemanager", {
title: "图片管理",
icon: 'image',
onclick: function () {
editor.windowManager.open({
title: "图片管理",
url: "/Administrator/Filemanager/Editor",
width: window.innerWidth * 0.9,
height: window.innerHeight * 0.8
}, {
editor: editor // pointer to access editor from cshtml
})
}
})
});
<script>
//获取tinymce编辑器
var editor = top.tinymce.activeEditor.windowManager.getParams().editor;
layui.use(['upload'], function () {
var upload = layui.upload;
var dirId = $("#dirId").val() == "" ? 0 : $("#dirId").val();
upload.render({ //允许上传的文件后缀
elem: '#upload-img-btn'
, url: 'UploadImage?dirId=' dirId
, accept: 'file' //普通文件
, multiple: true
, size: 1024 * 2 //限制文件大小,单位 KB
, exts: 'jpg|jpeg|png|gif' //只允许上传压缩文件
, done: function (res) {
if (res.code == 0) {
window.location.reload();
}
}
});
//删除图片
$("#delete-img-btn").click(function () {
var checkeds = [];
$("input[name='file-id']:checkbox").each(function () {
if (true == $(this).is(':checked')) {
checkeds.push({
id: $(this).data('id'),
type: $(this).data('type')
});
}
});
if (checkeds.length == 0) {
layer.alert('请先选择需要删除的文件!');
}
else {
layer.confirm('删除后将无法恢复,请确认是否要删除所选文件?', {
btn: ['确定删除', '我在想想'] //按钮
}, function () {
$.ajax({
type: 'post',
url: 'CheckedFilesDelete',
data: { checkeds : checkeds },
success: function (result) {
if (result.code == 0) {
window.location.reload();
}
else {
showMsg(result.msg);
}
}
})
}, function () {
});
}
})
})
//添加图片至编辑器
$(".file-img").click(function () {
var url = $(this).data("url"),
title = $(this).data("title");
//添加确认
layer.confirm('是否需要添加此图片?', {
btn: ['确认添加', '我在想想'] //按钮
}, function () {
editor.execCommand('mceInsertContent', false, '<img alt="' title '" src="'url '"/>');
editor.windowManager.close();
}, function () {});
})
</script>
转自:https://blog.csdn.net/qq_45670012/article/details/101991421
//视图
//pagination::simple-default //tailwind樣式
//pagination::simple-bootstrap-4 //bootstrap UI
$data->links('pagination::bootstrap-4')
//CSS定义
.pagination {
display: inline-block;
padding-left: 0;
margin: 20px 0;
border-radius: 4px;
}
.pagination > li {
display: inline;
}
.pagination > li > a,
.pagination > li > span {
position: relative;
float: left;
padding: 6px 12px;
margin-left: -1px;
line-height: 1.42857143;
color: #428bca;
text-decoration: none;
background-color: #fff;
border: 1px solid #ddd;
}
.pagination > li:first-child > a,
.pagination > li:first-child > span {
margin-left: 0;
border-top-left-radius: 4px;
border-bottom-left-radius: 4px;
}
.pagination > li:last-child > a,
.pagination > li:last-child > span {
border-top-right-radius: 4px;
border-bottom-right-radius: 4px;
}
.pagination > li > a:hover,
.pagination > li > span:hover,
.pagination > li > a:focus,
.pagination > li > span:focus {
color: #009688;
background-color: #eee;
border-color: #ddd;
}
.pagination > .active > a,
.pagination > .active > span,
.pagination > .active > a:hover,
.pagination > .active > span:hover,
.pagination > .active > a:focus,
.pagination > .active > span:focus {
z-index: 2;
color: #fff;
cursor: default;
background-color: #009688;
border-color: #009688;
}
.pagination > .disabled > span,
.pagination > .disabled > span:hover,
.pagination > .disabled > span:focus,
.pagination > .disabled > a,
.pagination > .disabled > a:hover,
.pagination > .disabled > a:focus {
color: #777;
cursor: not-allowed;
background-color: #fff;
border-color: #ddd;
}
.clear{
clear: both;
}
也即是官方给的方法,在\App\Providers\AppServiceProvider
中的boot
方法中引用。
use Illuminate\Support\ServiceProvider;
/**
* Bootstrap any application services.
*
* @return void
*/
public function boot()
{
Paginator::useBootstrap();
}
有时候可能会遇到这种情况,$dataA
和$dataB
是从数据库取出的两个不同的数据集合,需要同时将$dataA
和$dataB
分配到视图并进行分页展示,那这种情况怎么办呢?
//控制器中
public function index(LiveService $liveService, Request $request)
{
//数据A
$dataA = User::where('status', 1)->get()->toArray();
//数据B
$dataB = User::where('status', 2)->get()->toArray();
$data = array_merge($dataA, $dataB);
//当前页数 默认1
$page = $request->page ?: 1;
//每页的条数
$perPage = 4;
//计算每页分页的初始位置
$offset = ($page * $perPage) - $perPage;
//实例化LengthAwarePaginator类,并传入对应的参数
$data = new LengthAwarePaginator(array_slice($data, $offset, $perPage, true), count($data), $perPage,
$page, ['path' => $request->url(), 'query' => $request->query()]);
return view('admin.users.index', compact('data'));
}
//视图中
{{ $data->links() }}
<IfModule mod_rewrite.c>
Options +FollowSymlinks -Multiviews
RewriteEngine On
RewriteCond %{REQUEST_FILENAME} !-d
RewriteCond %{REQUEST_FILENAME} !-f
RewriteRule ^(.*)$ index.php [L,E=PATH_INFO:$1]
</IfModule>
转自:https://blog.csdn.net/summerliguilong/article/details/80505573
如果你不是开发一个「玩具项目」。那么,使用模块以及按模块功能进行划分是比较推荐的做法。集中管理模块的实体、控制器、视图、路由、配置等信息。还有啥?以及更方便的在多个应用间进行代码转移。
优势
代码的封装
代码中的顺序
多应用的代码转移
代码生成器 — 模块、控制器、实体类等
详见 Github https://github.com/nWidart/laravel-modules
如果你不知道 Spatie,你应该开始立刻开始了解他们!伟大的公司。Spaite
的角色和权限包是权限包中最优秀的之一。
优点
角色
权限
直接权限
中间件
丰富的 blade
模板命令Artisan
命令
哪里获取?https://github.com/spatie/laravel-permission
如果你使用 DataTables
并且你在创建你自己的 JavaScript、Ajax、
路由、数据库查询、过滤器、搜索等。相信我,这是一个更好的解决方案。
优点
使用简单DataTable
服务
自定义数据库查询
生成 JavaScript
多重定制
哪里获取?https://github.com/yajra/laravel-datatables
说实话,我不喜欢在 HTML
中混合表单。Laravel
表单构造器能够让你的表单从 HTML
视图中分离出去。
优势
使用简单
表单对象化
支持多个表单字段
支持子表
轻松创建自定义表单字段
详见 Github : https://github.com/kristijanhusak/laravel-form-builder
在保存了表单数据后,我会重定向到列表页,编辑页或者展示页。有了 Flash
通知,我们可以轻松的给到用户成功,警告或者错误的提示。
优势
使用简单
多个参数 (成功,错误,警告, 弹窗,语气等)
自定义视图
详见 Github : https://github.com/laracasts/flash
如果你的应用需要很简单方便的根据用户角色或者权限来更改不同的菜单项的话,这个包你可不要错过了。
优势
使用简单
多视图复用
自定义
数据可填充性
可缓存
看这里看这里 https://github.com/spatie/laravel-menu
很多数据管理员都想记录他们用户的所有活跃记录。这个包可以很方便的记录你的用户何时何地的创建、更新实体的记录。外加,现在这个包还可以记录多个版本的实体间数据的变更。
优势
简单的实体实现
记录所有创建、更新实体的用户和次数
支持记录自定义信息(登录、登出等)
戳我呀 https://github.com/spatie/laravel-activitylog
这是我的菜!根据请求的数据对象自动进行前端验证是不是听起来就很赞? 对,没错!我们懒人的目标就是—代码越少越好!
优势
根据请求对象生成前端验证
不需要写任何 Javascript
代码(对,你没听错)
支持异步验证(唯一、是否存在、自定义规则等)
多语言
快点吧 https://github.com/proengsoft/laravel-jsvalidation
如果你的应用包含比较多而且复杂的配置项(主题、logo
、公司设置、API
设置、默认设置项等),那这个包就派上用场了。它在数据库中保存一个键值对(key => value
)的配置信息,然后你就可以很方便的在应用中用辅助方法使用它们啦!
优势
可缓存
可加密
可上下文的设置项 (用户举例)
哪里获取呢? https://github.com/edvinaskrucas/settings
在开发 SASS
应用服务是,每个客户都有各自独立的数据库、域名和子域名,并且不会把这些都放到同一个代码仓库里。如果你有类似的需求,此项目既是为你准备的。
功能:
多数据库;
多域名和子域名;
自动生成 Apache
或者 Nginx
配置文件;
支持队列;
支持文件分开存储。
可以从这里获取:https://github.com/hyn/multi-tenant
可以让你的 PHPStorm
支持自动补全,支持的类型有 Model
、Facade
和数据库实体字段等。https://github.com/barryvdh/laravel-ide-helper
https://github.com/letsdrink/ouzo-goodies
https://packagist.org/packages/laracasts/utilities